Monochromatic Rainbow with the StencilGirl Team: RED

monochromatic-rainbow-blog-hop-header-.jpg

Welcome to the hop! I hope you see your favorite color at a blog along the way and decide to try your hand at using a single color only changing the tint and tone by adding black or white paint.

Don’t forget to comment on this blog and the others for a chance to win a Gift Code for $25 worth of stencils!

love-1.jpg

Seems like it would be a relatively easy challenge, right? Try it. It will stretch your skills.

My color was red.

reds.jpg

Initially, I wanted to start with a candy apple red (like a shiny red sports car). I played around with craft paints, and student acrylics, but as I played around with stencils and paper trying to find the colors I wanted to use the red did not “pop”.

So I went for Golden’s Cadmium Red and IZink Ice Red.

love-stencilgirl-stencils.jpg

The YADA stencil is my starburst, and the YADA stencil is the web holding it in place.

You can see in the pic below where I added some water to my brush to add a darker tone. I didn’t want drips so I just let it dry. This is just the Cadmium Red:

love-3.jpg

I don’t know about you, but I associate red with hearts, cardinals, blood, roses, or Santa Claus. I wanted to try to move away from those themes, but I swear the YADA stencil crawled onto my desktop and looking in an old magazine for a couple of words it happened to be a February issue hence: Love Transforms.

Will these elements make it? Will the journal page stay as a portrait orientation?

love-2.jpg

I like this but thought it needed a bit more light and I cut the tissue element (upper right) in a couple of pieces trying to make it work before I set it aside.

I took the YADA stencil and added more bursts, this time applying the IZink Red with a scraper to give the page some texture. After it dried, I added some outlines in red, black and pink pens.

love-1.jpg

Here is the final result, or not, because love continues to transform, right?!

love-stencilgirl-carol-baxter.jpg

footer-monochromatic-rainbow-blog-hop-win-.jpg

Do be sure you check out all the wonderful artworks in our Creative Team Monochromatic Rainbow Hop.

Shel Cee – Violet

Peg Robinson – Purple

Sue Plumb – Blue

Linda Edkins Wyatt – Green

Jennifer Gallager – Yellow

Claudia Neubacher – Orange

YOU ARE HERE: Carol Baxter – Red

Sunila Mahajan & Aditi Mahajan – Gold

Natalie May – White/Black

Debi Adams – Indigo

Comment on the blogs for your chance to win one of the $25 gift certificates for StencilGirlProducts.com.

Contest ends April 27, 2020, at 11:59 p.m. Central Time USA. Winners will be contacted via email the 28th.

Gift-Worthy: Stenciled Mixed Media Advent Calendar

gift-worthy-stencilgirl-creative-team-blog-hop-header-720px.jpg

Hello! I had an advent adventure with stencils and stuff from my stash!

When you finish looking, comment on this post and you might win free stencils!

I keep my radar up starting at the end of summer for small Christmas gifts to make (using stencils) or give. I’ve found it makes my budget manageable because it doesn’t allow me to feel rushed at the last minute.

mixed media stenciled advent calendar stencilgirl carol baxter.jpg

It is simply perfect for…… well I can’t tell you WHO because SHE might read this post!

I am not a fan of wire coat hangers, but I sure think this is a fantastic use for one. I painted the cardboard red and wrapped the wire part with a green ribbon.

stenciled-advent-calendar-closeup-2--stencilgirl.jpg

I hung the following 24 items with ribbon or string to the hanger:

  1. Cloth tea bag filled with sweet-smelling cloves and orange peel.
  2. Cup – This was a red wine tasting cup wired up and simply wrapped with a piece of white linen with the # stenciled on it.
  3. Stenciled ribbon embellished with red pen and glued to a brown bag. Good for a lottery ticket.
  4. Stenciled library card in a stenciled pocket. Nice for writing a sentiment.
  5. Stenciled vellum tag.
  6. Stenciled cork tag embellished with sewing pattern collage paper.
  7. Teabag with a word and a # stenciled on it. Stuffed with Constant Comment Tea.
  8. Little red painted box tied with ribbon and embellished with stickers from the SWAG exchanged at An Art Journal Affaire back in 2017!
  9. Another cup, wired up and stenciled with a little # tag on it. I recommend that you secure with washi tape whatever you put in the cups.
  10. Heart pin I might have made at an art products trade show is pinned to a tag.
  11. Narrow, stenciled elf bag.
  12. Double star (traced from a stencil) with a quarter gluing the 2 halves together.
  13. Stenciled, embellished library card with little people peeking out of the pocket.
  14. Stenciled green envelope.
  15. Pendant (Ice Resin & glass glitter) hanging from a tag that was made with Flitter. The tag is hanging from a cinnamon stick.
  16. Cloth v banner – Lindt truffle stapled to the back
  17. Different pendant.
  18. Stenciled ornament tag.
  19. Candy cane with a small number tag (Great idea huh? I faked it with a straw – no candy canes in stores near me, yet.)
  20. Stenciled star box made from cardstock and sealed with washi tape.
  21. Sparkly stenciled tag with Thermo-Wed Glitz Glitter Gel.
  22. Little brass and lace dress ornament.
  23. Organza baggie – the number is stenciled on a piece Citra-Solv paper Nancy Curry gave out at Art Journal Affaire
  24. Stenciled, sparkly hummingbird tag.

stenciled-advent-calendar-closeup-1-stencilgirl.jpg

As to treats: candy, light-weight jewelry, gift card, money, chapstick, tiny scented candle, sweet little notes specific to the person the advent calendar is for. I figure the tags can either stand-alone or I’ll affix a wrapped chocolate truffle to the back.

stenciled-advent-calendar-closeup-4--stencilgirl.jpg

Stencils used: Never Ending Calendar Mini by Carolyn Dube (perfect for numbers), ATC Mixup Stencils by Mary Beth Shaw (perfect for numbers too!), Andrew Borloz, June Pfaff Daley, Jennifer Evans, and Pam Carriker, Vintage Ornaments by Cathy Nichols, Art Deco Alphabet by Gwen Lafleur.

stenciled-advent-calendar-closeup-3--stencilgirl.jpg

I handmade the star-shaped box with Mary C. Nasser’s First Star on the Right StencilClub set.

  • Trace the stars you want 2 times on cardstock or heavy scrapbook paper. (I kinda wish I had made bigger stars.)
  • Cut out the stars, one on the lines, the other ever-so-slightly larger than the lines.
  • Cut strips for each star to make the edges of the boxes. For instance, the edge of one of my stars was 1” so I cut one 5” by 1” strip and scored at the ¼” on the horizontal and 1” on the vertical. The second strip was based on the same principle but again, ever-so-slightly larger.
  • If you are planning to use a stencil to decorate the star box, now is the time.
  • Use glue inside or washi tape outside to affix sides to top and bottom.

stenciled-advent-calendar-closeup-5--stencilgirl.jpg

Project timing tips:

  1. Gather all your stencils, boxes and bags, stashy stuff and tools in one pile. I had bits of ephemera, red wire, jingle bells, ribbons and cords, tags, washi tape, glue, wire cutters, etc.
  2. If you are going to make this in one sitting, allow yourself at least the whole morning. Better yet, invite a friend over and you can each make one as well as enjoying the day with a lovely break for lunch. Or put on your elf hat and work secretly by the light of the moon.

stenciled-advent-calendar-closeup-8--stencilgirl.jpg

Transport tips:

Put a towel on a large cookie sheet and lay the Advent Calendar down. If it’s a new cookie sheet, add a new kitchen towel — after you stencil the towel of course!

If you are shipping it, lay it on the pan and bubble wrap it.

stenciled-advent-calendar-closeup-7--stencilgirl.jpg

I first saw this Advent idea done (tan/white/gold/burlap) in a Stampington email. This hanging calendar is worth reimagining for Valentine’s Day, or Mother’s Day, don’t you agree?!

Wishing you a joyous rest of 2019!

Carol

p.s. Got cats? Dogs? Toddlers? Hang it high!

p.s. Don’t forget to check out all the other AMAZING gift-worthy projects from my fellow StencilGirl Creative Team Members! You might win free stencils! Good luck!

Sue Plumb’s Cookie Jar and Art Bag

Claudia Neubacher’s Tote Bag

Sunila & Aditi Mahajan’s Treasure Box

Peg Robinson’s Necklace

Shel C’s Journal Set

Jennifer Gallagher’s Paper Mache Gift Box

Linda Edkins Wyatt’s Beach Memories Painting

Jill McDowell’s Twisted Treasure Pouches

comment-on-the-blog-to-win-stencilgirl-gift-worthy.jpg

Contest closes 10-8-19 at 11:59 p.m. CST.  Winner notified by email 10-9-19.

stencil-advent-calendar-mxed-media-stencilgirl.jpg


Fun, games, nostalgia, and stencils

Hello Smiling Human!
Cynthia Silveri’s Fun & Games StencilClub Set for April 2019 is chock full of nostalgia for me.
fun and games stencilclub april 2019 cynthia silveri stencilgirl 1080 x 1080 .jpg
The 6×6 stencil depicts the gameboard. The real board was wooden and reversible, and the corner pockets were mesh. I never recall us using cue sticks, just flicking the red and green plastic discs into the pockets with our thumb and forefinger (nail beds bruised by the time the game was over).
I wish I could find a picture of us all playing “pool” because those were good times!
I did find this snapshot with the gameboard and a bunch of irrelevant stuff, but is it?
april sc voices carol with zantippy.jpg
Tip of the day: Don’t crop the background out of your old pictures because you think the foreground is all that is important:
1. Me and my brother’s dog Xanthippe. We got my dog, Socrates, a year later.
2. I am sure that is a calendar I made/colored on the wall.
3. Quilt frame and ironing board — a quilt must have been getting ready to go up although I think that is a (now classic) tablecloth behind me.
4. My Mom’s purse is hanging off the quilt frame too. Her purses were heavy (a true bag of infinite holding) and when we would travel overnight with Aunt Peggy and stay in a hotel, the pillows were too soft so Mom’d put her purse underneath as ballast. Or maybe she just thought no one could sneak into the room and steal it.
Thank’s for letting me share my story. Here are the present fun and games:
Ouch card (extra stencil used: Hands by Jessica Sporn)
table-top-pool-card-stencilgirl-stencil-club-fun-and-games.jpg
It seemed only fitting that me, my “Bruncle” Bruce, brother Wayne, and my mom should be the discs headed for the pockets as they are the people I recall playing against. This time, instead of sore nail beds, I have paint on my thumbs and forefingers to tell the tale of my fun and games.
You need to be a member of StencilClub to get this stencil set. You can join here.
More card-making fun I had with the set:
Winner, Winner card (inside stencil used: Chicken Cat by Judy Wise)
winner-card-stencilgirl-stencil-club-fun-and-games.jpg
chicken.jpg
Alternate sentiment: What the cluck. You thought you were gettin’ a cool Million bucks?!
It’s All Fun and Games Until…. card (inside sentiment: Parchesi me please. I’m sorry I was THAT person.)
that-card-stencilgirl-stencil-club-fun-and-games.jpg
Insurrection card
It’s possible the green dudes need more embellishment, eh?
pawns-card-stencilgirl-stencil-club-fun-and-games.jpg
May you enjoy your little insurrections and don’t cry over spilled paint,
Carol

Meyer Lemon Parmesan Rosemary Rolls

I can’t show you a picture yet because the first 2 batches magically disappeared into the mouths of friends. Thank you, friends!

Combine in a large bowl. (I use a giant Tupperware bowl so I can knead the bread in the bowl.)

  • 1/2 cup sugar
  • 1 cup warm water
  • 1 large egg
  • generous pinch of salt – about a teaspoon
  • 3 pinches dried rosemary that I’d ground a bit in a mortar & pestle (Next time I will use chopped fresh rosemary!)
  • scant 1/8th cup Meyer Lemon Oil (I really mean “scant”. A full 1/8th is overpowering.)
  • 1/4 cup olive oil

Then, stir in 1 packet of yeast.

Let sit until bubbly – about 10 minutes.

Add 1/2 cup grated Parmesan cheese (I tried a combo of Parm and Roman, the Parm alone was better.)

Gradually add in 3 1/2 cups unbleached flour.

Knead into a ball.

Cover with a clean kitchen towel.

When dough doubles in size, roll out to about 1/2 inch high on a floured surface.

Cut rolls and place on parchment covered baking sheet, slightly touching.

Important: “Slightly touching “except for the two rolls you have to taste test, even though you know they will turn out yummy, so fresh from the oven they are almost too hot to eat!

Cover and let rolls about double in size.

Bake in a pre-heated 350 F oven until the tops appear golden brown, about 12 minutes.

Mix melted butter and minced garlic together then brush tops of rolls.

Smile as the rolls you made disappear!

Enjoy!

Carol

No need to buy a paper doll (costume) DIY

Halloween is my fave holiday!

The only drama is convincing my hubby Ray he wants to make me happy by dressing up. Lucky for me he is a good sport. I found a stellar musical note shirt and an outrageous record player necklace for the 24k gold plated bling for his Bruno Mars costume. (You knew Bruno grew a mustache, right? LOL)

carol-baxter-ray-stenciled-costume-paper-doll-ray.jpg

I went as a paper doll!

paper-doll-carol-baxter-stenciled-costume-stencilgril-retro-comets-stencil.jpg

Suggested by the tune-track playing in my head. My Popa used to sing the first couple of lines to the Mills Brothers’ “Paper Doll” to my mom.

I’m gonna buy a paper doll that I can call my own
A doll that other fellows cannot steal

I don’t know that I had ever heard the full song from the 1930s until I started this costume and went looking for it. Paper Doll by the Mills Brothers. 

paper doll costume.JPG

I saw the cute costume above. Alas, not in my size. But a good idea I thought. It’s just a front so I will be free to move, especially if I build it in 2 pieces.

  1. Fabric-paper means I can sit and the paper will bend without too obnoxious a crease.
  2. I can always recycle the paper into my art journal.

Yeah, but I have a larger bust than the model. What to do? Then I saw this coffee filter dress.

Capture.JPG

Eek! I am so not doing that skirt, but I am grateful it gave me a solution for my bustier top. Coffee papers are flexible and shaped right. Saved!

I know, I know, you might have heard me swear off coffee filters after I made a couple hundred paper and coffee filter flowers for my wedding, so this should be relatively easy… oh, the little white lies we tell ourselves!

BUSTIER

Materials for bustier:

  • Coffee filters
  • Washi tape
  • Color Sprays – Lindy’s seem to be the only ones that do not clog.
  • Acrylic paint – white to repair a sprayed area I did not like.
  • Retro Comets Stencil by Mary Beth Shaw
  • Double-sided tape and packing tape

L048-2T.jpg

DIY:

  1. Fold your coffee filters in thirds for the tabs and waist. Fold a bunch over leaving about a 1″ ruffle, fold a few in half, and some I simply flattened.
  2. Your shape is not my shape. I suggest, you kinda build the costume as you try it on, taping as you go.
  3. I completed the V and waist part of the bustier with washi tape.

Front of bustier before paint (the back looks pretty similar but there’s a goodly amount of tape.

coffee-filter-top-front.jpg

SKIRT

Because my top had become so ruffled, I decided to go with a pencil skirt.

Skirt Materials:

  • Trash bag(s) so you can peel up your fabric-paper.
  • Painter’s or another removable tape
  • A mixture of 2/3 Elmer’s Glue and 1/3 water or Modge Podge
  • Cloth a bit bigger than your pattern – I used what I had in my stash, a 25-cent pillowcase I picked up from the Pine Senior Center Thrift Store as the base for my fabric-paper. You could use muslin or cheesecloth.
  • A combo of papers from your stash – I used:
    • book paper – worked like a charm!
    • saved baby wipes – thicker so took longer to dry
    • paper wine labels – must have been backed with some kind of plastic as they did not want to play nice with the other papers
    • misc previously stenciled papers
    • a shopping list
    • a receipt – thermal paper loses its ink
    • printed tissue paper
  • Stencils used:
  • Acrylic paint – white mixed with water to “knock back” the colors and unify the collage. Then I stenciled with red, yellow, and blue because it would match my comic strip makeup.
  • Sponges for paint
  • Safety pins to attach costume to clothes later.

S288-2T.jpg

DIY:

  1. Tape down your trash bags.
  2. Tape down your fabric.
  3. Paint layers of glue mixture on to fabric and papers. Tip: Generous glue over stingy!
  4. Let dry completely overnight and hit with a heat gun if necessary.
  5. Stencil over the top and let dry.
  6. I considered this, but why use one stencil when two will do?! Optional: Make a 6” slit in the skirt over one knee, and alternate coffee filters in slit and above it as a ruffle.

collage.jpg

Step 3 above. Step 5 below.

knocked-back-collage.jpg

I must admit, I am pretty dang stoked how my costume turned out!

stenciled-paper-doll-costume--carol-baxter.jpg

HAIR

There are as many amazing patterns for paper hair as there are for paper dresses. The Cardboard Collective has a good starter diy.

Serendipitously, the hat for my hubby’s costume came with a half head shaped insert. All I had to do was copy the pattern and viola! Full head wig structure.

In addition to the wig structure you will need:

  • Newspaper and scissors to cut individual locks of hair
  • Barrettes or bobby pins
  • Marker
  • Tape to hold the hair in place

DIY

  1. Mark where your barrettes are going to clip on to hold the wig in place. You do not want to glue hair over the top of these.
  2. I went for curls about 1” wide cut mostly the length of the newspaper but a few, the width. I learned newspaper cut in strips curls pretty much like curling ribbon. Pay attention and if there are pics with colors you want to show, curl them out.
  3. Starting at the bottom, I taped ringlets in place then affixed with single and double-sided tape.

carol-baxter-newspaper-hair-and-makeup.jpg

MAKE-UP!

A Jack-o-Lantern full of thanks to my buddy Joe for doing such a fantastic job applying my (water soluble) make-up!

joe-makeup.jpg

face.jpg

I cried my paper doll came out almost exactly as I imagined. Happy dance!

The costume was as labor intensive as I thought it would be and somewhat more difficult, but I had a truly good time making it and I was absolutely ready to PARTY!

HAPPY HALLOWEEN TO YOU!

Carol

Popsicle Cards

This is my face when it is hot in Arizona and there are no cold popsicles in the freezer. Bawahaha!

gel-plate-frown.jpg

I mean, you must roll that paint across your gel plate quickly or the dry heat will desiccate your printing plans.

I was speedy!

These are the StencilGirl® stencils I used….

stencilgirl-stencils-popsicle-card-making.jpg

… to create this pile of never-melting Popsicle fun!

oh-boy-treats.jpg

You can get Popsicle “forever stamps” at the US Post Office for a limited time! They are even scented.  (I think they smell like Jolly Rancher Watermelon Candy.) When I saw them, I knew I had to make cards!

I made gelli printed papers – some stenciled, some not, hand cut the Popsicles and sticks, and then used Inktense pencils, Sharpie Pens, a white pen, Prima Watercolors, and washi tape to embellish.

I confess that I ordered washi tape especially to match the postage stamps; I am getting ahead of myself.

Making cards was FUN! FUN! FUN! I stopped counting at a dozen.

Are you old enough to remember sharing the other half of your orange creamsicle with a friend? I guess you can still buy “twin pops” but I do not think they are made by Popsicle.

I made my “Anything is Popsicle” card first. The “half for me and half for you” creamsicle actually pulls out.

anything-is-popsicle-stencilgirl-sea-of-grapes-stencil-card-carol-baxter.jpg

Then I thought, who wants a creamsicle when you can have a margarita?

creamsicle-margarita-card-carol-baxter-stencilgirl-loose-woman-stencil.jpg

It is no secret that I love the Loose Women stencils.

I flipped the stencil so her hand was pointing up to hold the creamsicle.

Before painting with water:

pre-water.jpg

Many people like to make their own cold fruit pops! Yum!

popsicle-pineapple-card-4-flowers-stencil-stencilgirl-march-2017-stencilclub.jpg

Those stamps are too much! Watermelon and strawberry and lime, oh my! Looks like one is even dipped in chocolate.

Did you call those red white and blue Popsicle “bullets” or “bombs”?

de-2013-stencilgirl-stencilclub-stencil-you-da-bomb-card-carol-baxter.jpg

I was on a roll! I even cut drips on a few.

stenciled-popsicle-stencilgirl-cards.jpg

Of course, I had to get snarky.

The line about the stick I read somewhere. The response, well, I had to have the last word 🙂

not-a-drip-card-carol-baxter-stencilgirl-april-2016-stencilclub-sea-of-grapes-stencil.jpg

As long as I made one ice cream cone, I went ahead and made more.

sherbet-its-your-birthday-card-stencil-stencilgirl-carol-baxter--twist-lattice-lizzie-mayne.jpg

Sure bet…

Get it?

Hey, I work from home. I must amuse myself  🙂

A different line could be: Our friendship is a sure bet.

Wishing you a cool rest of the summer chillin’ with your friends!

Carol 

P.S. The stencils I used:

4 Flowers, Loose Woman 1 & 2, Sea of Grapes, Twist Lattice, Night Sky  Night Sky is not pictured –  it fell into the black hole in my desk!

Stencil Club: June 2018, Nov, Aug, and Mar 2017, Nov and Apr 2016, and Dec 2013  – also sucked into the black hole, but both stencils will somehow appear in the middle of my desk in the next 24 hours…


Music May – Drowning in a Sea of Love

This is what happens once a month when the Baxter (or Norman) living room becomes a music hang-out. There have been as many as 8 of us, but this month we were 4 ~ me, Ray, Randy, and George. No matter the number, there always seems to be a flow to the selections people choose. I am sharing the plays as You Tube links although half of these we simply listened to on the turntable or CD or as mp3s.

Ray started out the night with Louie Louie written by Los Angeles based singer Richard Berry. (You can read Ray’s entire post about the song here.)

Louie Louie was released in 1957 on Flip Records (as a “B” side) by Richard Berry & the Pharaohs. The 1956 songs “El Loco Cha Cha” by Latin bandleader Rene Touzet and “Havana Moon” by Chuck Berry (no relation) were major influences.

20180524_143932.jpg

As play continued, Ray brought out his pic of Richard Berry and signed album, the trivia gained serendipitous wings.

Did you know: Richard Berry’s voice rings out on Etta James’ hit Roll with Me Henry? (That and the song Work with Me Annie by Hank Ballard and the Midnighter’s could be a post unto itself!)

Ray played Mary Lou by Young Jesse and Randy asked if he’d ever noticed that Young Jesse sang backup on Tell Me You Love Me on Berry’s Louie, Louie LP. Ray had not. (These two, I swear, they get excited like little kids! Keeps ’em healthy and happy!)

Ray treated us to a Mary Lou version by Ronnie Hawkins & the Hawks 1959 and a live version by Frank Zappa & the Mother’s of Invention (helium anyone?!).

More trivia: If you are familiar the group called The Band from the late 1960s/early 70s, not Ronnie, but the best of the Hawks eventually formed that group in the late 1960s.

I imagine you could be familiar with Werewolves of London by Warren Zevon. Have you heard Desperado Under the Eaves? Randy shared it. Having lived in SO Cal, my ears pricked up at this lyric:

And if California slides into the ocean
Like the mystics and statistics say it will
I predict this motel will be standing until I pay my bill

Randy likes amusing songs. Hence Stan Ridgeway’s Peg and Pete and MeToe ~ Zach Brown Band, and Girl in a Country Song ~ Maddie and Tae (True this.).

My hands-down fave play of the night, Sound of Silence as performed by Disturbed. (I might still be in shock that this was a pick from Ray, except how does one not like this song?) Lead singer David Draiman’s voice is amazing and if it does not give you chills please get someone to check your pulse quick!

On that heavy note, George shared a version of the Cranberries’ Zombie by Bad Wolves, you can hear how the orig lends itself to this darker version. Apparently sales proceeds from their version go to Dolores O’Riordan’s children.

George shared Skin by Rag n Bone Man, a song about holding on to someone when the love is gone or perhaps was not there in the first place.

He also shared  What a Shame by Shinedown with this lyric I loved, “There’s a touch of grey for every shade of blue…”

Playing off of my downed love theme or George’s chosen genre, Randy used one of his plays for Nearly Forgot My Broken Heart by Chris Cornell of Sound Garden fame.

Check out the instrument Luna Lee is playing. It is a Korean Guyaguen. I wonder if the Musical Instrument Museum has one.

Luna Lee’s Patreon site: https://www.patreon.com/lunalee/overview

My theme for the night was drowned love. What songs come to your mind when you think of drowning in a sea of love? Maybe:

  • Sara ~ Stevie Nicks “…drownin’ in a sea of love, where everyone would love to drown…”
  • Sea of Love ~ Honeydrippers Theirs is the version I heard first in the mid 1980s. I am married to an early Rock and Roll historian and now know the original was by Phil Phillips, 1959.)
  • Beaches of Cheyenne ~ Garth Brooks
  • Bitter Green ~ Gordon Lightfoot “…some say he was a sailor who died away at sea…”
  • Venezuela ~ John Jacob Niles 1957 Rita Connolly’s version is the one I heard first and like the best but my fave by her is Ripples in the Rockpool.

In search of songs old, new, borrowed, and blue, I picked these for music night:

New to my ears:

Lost at Sea ~ SHEL (2014) Angelic harmonies from this group of sisters! I liked them so much I bought the digital download of their first – what do we call it now – LP? Ha!

Jackie ~ Sinead O’Connor (1988) Periodically I dive into the mountain of hitherto not listened to recordings we collected over the years. That’s where I found Jackie.

Drowning in a Sea of Love ~ Joe Simon (1969?)

Not new:

Capsized ~ You + Me (Rose Avenue LP 2014) This is P!ink singing with Dallas Green. Nice perk of star power – making a totally different type of album with a buddy. Ray and I played You + Me the song at our wedding.

Ghosts of Cape Horn ~ Gordon Lightfoot Lesser-known than the Wreck of the Edmund Fitzgerald.

Brandy ~ Looking Glass (1972) As often as I have sung along with this classic tune, I had paid no attention to who performed it. Now I grew up in the 1970s so the clothing, ahem, style, is not unfamiliar but lead singer Elliot Lurie needed to take a cue from his bandmate and at least wear bell bottom jeans. The song still gets 5 stars, but maybe satisfying my curiosity as to the singers was not the best idea.

The rest of the evening’s playlist (not including the 30 or so songs Randy could not get to!):

Burnout ~ Midland

Leonard Cohen’s Suzanne, performed by Joan Baez (I admit, I did not get to this one.)

Simple Man ~ Shinedown (originally by Lynyrd Skynyrd)

68 year old sings ACDCs Highway to Hell omg, I hope I am still rockin’ at 68, 78, 88, 98, 108 LOL

After Insanity (guitar play by Sophie Lloyd)

Havana ~ Camila Cabello feat. Young Thug a thug – her parents must be so proud. LOL

Just a Gigolo ~ Dave TV Version (I didn’t play the one by Marlene Dietrich and David Bowie but it is quite the contrast!)

Kelly Clarkson and Jimmie Fallon Duets

Somewhere in Brooklyn ~Bruno Mars

How ’bout you? I was inspired by my friend Gwen’s post to go with the groove and link up all my notes.

Do you still have 45s? albums? CDs? Have you graduated to streaming? Ever just sit and listen to music at home for the sheer joy of it?

A brief history of the song “Louie Louie”

By Ray Baxter

This iconic song was written by Los Angeles based singer Richard Berry. It was released in 1957 on Flip Records (as a “B” side) by Richard Berry & the Pharaohs.

The 1956 songs “El Loco Cha Cha” by Latin bandleader Rene Touzet and “Havana Moon” by Chuck Berry (no relation) were major influences.

“Louie Louie” became very popular in Washington state with many local bands performing it live. Two bands to actually rerecord it in 1961 were Little Bill & the Bluenotes on Topaz records, and Rockin’ Robin Roberts & the Wailers (nothing to do with Bob Marley’s group); it was this latter version where the arrangement was dramatically changed from Berry’s original. Then in April 1963 within a week of each other, two local bands from Portland, Oregon also recorded “Louie Louie;” they were Paul Revere & the Raiders and The Kingsmen.

The most popular version is the Kingsmen’s recording, and it is likely the result of the supposed “dirty lyrics” that caused an uptick in sales. An official investigation was started by the FBI, but nothing was found regarding the lyrics; interestingly at the 54 second mark the drummer curses when dropping a drumstick but this the FBI did not take note of. The actual lyrics (on next page) are quite simple and tell the story of a Jamaican sailor returning home to see his love interest. The sailor is chatting with a bartender whose name is Louie.

There are numerous musical mistakes made by Jack Ely (lead singer of the Kingsmen) and my friend and R&R historian Randy Hill told me the following:

“The Kingsmen recorded in Portland at 10:00 on a Saturday morning in 1963. The studio was actually normally a musical theater setting. The Kingsmen’s manager wanted to get a “live” feel, so he had the recording engineer raise the mic far off the stage floor. Jack Ely stood in the middle of the musicians. He was kinda sick (not drunk) that morning, plus he had braces on his teeth. Add to this the fact that he had to lean back and yell up at the mic, and you can see how everything came out slurred.

The first take was supposed to be a sound check. The drummer yelled “fxxx” shortly into the song, although it’s unintelligible. Ely came in too soon after the break and started over. Ely’s yelling “Let’s give it to ’em” and “Let’s move on outta here” supposedly came from the Wailers. Anyway, the Kingsmen were aghast that their manager wanted to release the mic check as the record. They begged him to let them do the song again, hut he was adamant that this had the raw sound he had hoped to get. The rest is history.”

Richard Berry sold the rights to most of his music (including “Louie Louie”) in 1959 for $750 to finance his upcoming wedding. Despite all the success of his signature song, during much of his adult life he saw no benefit. But then with the help of an attorney Richard was able to reclaim the rights to his song and received in 1992 his first royalty check for $2 million. Sadly, less than five years later in January 1997 he died at the age of 61 due to heart failure.

By some counts there are more than 1600 released versions of “Louie Louie” making it one of the most recorded Rock & Roll songs ever.

My Mom’s Pizza + a few more recipes

Today I woke up and decided to make my mom’s recipe for pizza for dinner.

momz-za

One has to make dough first and it’s not like any pizza anyone else in the world ever probably eats, unless someone out there still has the 4th Ward Relief Society’s Cookbook they complied as a fundraiser in the mid-1980s – straight from the days when Campbell’s Cream of Mushroom Soup was a pantry staple.

As I pulled the cookie sheet out of the drawer to prep it for the dough I realized mom probably made it on a cookie sheet because she did not have a pizza pan. (Guess we ate so much Organ Stop Pizza there was never a need.)

Oh, yeah. And tomorrow is Mother’s Day.

mom for wed.jpg

Between that date on the calendar and a slight case of the monthly blues, NOW I know why I am mixing up and rolling out dough. (Hey Angel Peggy! I am tempted to drive to town and buy pecans to make Mexican Wedding Cookies, but your cookies were extraordinary.)

Bread is one of my favorite words.

Fresh from the oven bread is hands-down, over any sweet treat, my favorite thing to eat.

It is comfort and home, mother and love.

for if you bake bread with indifference.JPG

Making bread makes me cry and makes me happy.

She was perfectly imperfect. When we didn’t see eye to eye it was startling and we had to work to get back to moving forward. I never felt unloved.

Jean mothered everyone!

To all of my friends who are aching for just one more moment of mothering or chance to express thanks – I feel you. Here’s a song link to Ed Sheeran’s song Supermarket.

To all of my friends who missed mothering, I truly wish I could somehow gift you a day of my mom’s abundant care.

                                                                                                                                   Love, Carol


Oh! If you wish to try a pizza that is not a pizza, here’s the recipe for dough and all the things mom and I made with with it:

Carol’s Mom’s Rolls

Jean Jennings lived to be 92 years old. She was my mom and my grandma coz she adopted me. This recipe and my love for her go hand in hand. When I was a child, Mom would bake these rolls in pie tins then have me deliver to her friends around the neighborhood.

Rolls

Add to one cup warm water in a large bowl:

An egg, a jigger or two of oil,

a pinch of salt,

sugar to taste (1/3 cup) and

one packet of Fleishman’s yeast.

Stir briefly with a fork.

Let sit until bubbly.

Mix in 3 ½ cups of flour until ball of dough forms.

Knead on a floured sheet of canvas fabric.

Let rise in bowl, covered with a towel, until double.

Knead, (punch out bubbles), roll out to about a ½ inch thick, then cut rolls and place rolls in pie tins or on cookie sheet.

Let rise until double.

Bake at 350 until tops are golden.

Butter tops.

Don’t eat them all before dinner!


My translation

In a large bowl mix:

One cup warm water (I find that bottled water interacts consistently with the yeast.)

One large or extra large egg

1/4 cup vegetable oil (Note that at some point in her later years she swears that she uses the white Crisco that comes in bars, but Carol swears this is absolutely not the recipe she learned.)

1 teaspoon salt (If you used a mineralized salt which I have discovered tastes better, the minerals can color the rolls if you are not adding spices.)

1/4 cup oil

1/3 cup sugar

One packet of yeast

Stir with a fork and let sit for about 10 minutes until bubbly.

Then, gradually add in at least 3 maybe 3 1/2 cups of sifted flour as you stir/knead to form ball of dough. (If you use a big enough bowl you do not need to turn it onto the counter—it can rise in the bowl.)

Let ball of dough raise for a couple of hours until it about doubles in size.

Tear ball of dough in half. Knead air bubbles out then roll out on lightly floured counter top to about a half an inch high. Cut out rolls.

Place them on a pan with sides barely touching. Let them raise until about double again. Bake at 350 degrees F until tops are golden brown—about 12 minutes.


Hot Dog Things:

Make hot dog things by slicing a Kosher hot dog not quite fully through the center and stuffing with diced green chili and cheddar cheese before wrapping in dough.

Place rolls on pan with ends barely touching and let raise again until double.

Hot dogs things need a 400 degree oven and a little longer than rolls to cook.

Butter tops.

Try not to eat them all, rolls or hot dog things, until dinner or wherever you are taking them. Great camping food for the road trip.


Carol’s roll variations:

  • Olive oil—used as a replacement for vegetable oil. Your dough will be heavier and take longer to raise.
  • Crushed garlic and/or other dried spices—yummy! Goes with olive oil. Add to during initial mix.
  • Grated cheese—I add maybe a half a cup during initial mix.
  • More sugar—sweeter rolls.
  • You can get them to raise faster on a cold day in the kitchen by pre-heating the oven and letting the dough rise on top of the stove.
  • I made them once adding yogurt and chopped fresh mint leaves. If you try this, you will need t adjust the flour up and the water down.
  • Virginia, a woman I worked with, used milk instead of water in her rolls. I have never tried that recipe modification, but her rolls were yummy.


Cinnamon Rolls

Grandma Jean used to bake cinnamon rolls in a deep iron pan with honey and pecans at the bottom (I believe you would need to add butter so that they would not stick).

I have tried but never duplicated the flavor of what is hardwired in my taste buds and memory. This is close….

Pre-heat the oven to 425 degrees.

Filling
3/4 cup packed dark brown sugar
1/4 cup raw sugar
1 tsp ground cinnamon
1/8 tsp sea salt
1 tbsp unsalted butter, melted

Turn the dough onto a floured surface. Flatten and shape the dough until it’s a 9 X 14 inch rectangle. Sprinkle the surface with the filling mixture, leaving a 1/2 inch border.

Tightly roll the dough using the 14 inch side. Cut into 8 pieces and place swirl side up in the baking pan. Start by placing one in the middle and then surround the center roll with the remaining rolls. Brush with 2 tbsp melted butter.

Bake 20 to 25 minutes.

Cream cheese frosting

Combine with a whisk:

For the icing
3 tbsp cream cheese, softened
3 tbsp buttermilk
1 cup powdered sugar

Spoon over top of rolls and you are ready to serve!


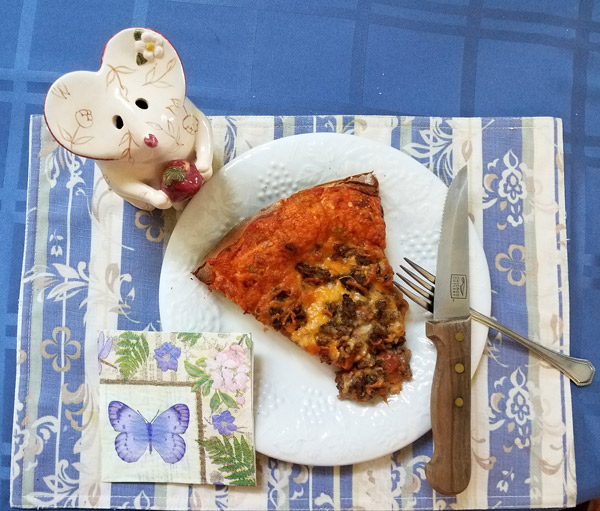
Grandma Jean’s Pizza

Roll dough out on a cookie sheet.

Mix together I can cream of mushroom soup, one can of tomato soup and two cans of diced green chilies. Spread mixture evenly across dough.

Brown a pound of hamburger and spread it across dough.

Dice onions to taste and sprinkle across dough.

Top with cheese.

Bake at 425 degrees until pizza crust is a golden brown (about 20 mins)


Stenciled Bottle Cover & Card

Lindy's Gang Blog Hop Banner.jpg

Welcome to my spot on the hop between StencilGirl Products’ and Lindy’s Stamp Gang creative teams! I am happy you’ve taken the time to stop by.

carol-baxter-stencilgirl-lindys-stampgang-hop-neoprene-bottle-cover
The whole cover shimmers in natural light. The human eye sees it. My camera does not.

I chose an unusual substrate for this project. A neoprene bottle cover.  I bought the bottle with the cover a couple summers ago because it had a speaker in the neoprene cover & the batteries were included. Geek out! I put it in the cabinet and forgot all about it until…

My husband threw out the bottle and the cover. Oh no! Must rescue.

Me to hubby: “Did you even try the speaker?”

My hubby: “No. It was just a cheap gimmick. You’re not pulling it out of the trash, are you?”

Me: (Eye roll.) “I am. I wonder if I can stencil on it?”

Hubby: (Big sigh.) “It’s trash.”

Me, in my office a few minutes later, speaker hooked to my phone, David Bowie singing “Nature Boy”, talking to myself: “The sound is truly weak. But I CAN stencil on the case AND the bottle has nice lines plus a clear space. I can soak off the label and stencil a new one.”

Here’s my process:

What stencil shall I choose? Sacred Feminine by Carol Wiebe. The minute I saw this stencil I knew I had to have it – look at all the interesting elements!

fimine-organicroots-stencils-stencilgirl-carol-wiebe-lindys-moon-shadow-mists
http://www.stencilgirlproducts.com/stencils-carol-wiebe-s/1990.htm

I thought it would be easiest to stencil with the cover still on the bottle. I chose to use acrylic instead of fabric paint because it’s not ever going to be washed. The speaker is sewn in, so it must remain as is.

Step 1: Mask off bottle neck. Gesso the bottle around the speaker – oh my, was that white line ever convenient! Let dry. Apply another coat of gesso.

paint-process.jpg

Step 2: I opted for a sprayed background created with Smokey Sapphire and Crow’s Nest Copper Moon Shadow Mists. These are walnut inks with mica in them.

shimmer.jpg

I sprayed on top of an open art journal so I have pages started for later.

overspray.jpg

Step 3: Tape around goddess so she stays in place. I balanced the bottle on the inside of my roll of masking tape as I applied a coat of silver and then a combo of navy blue, silver and white. I had to do some awkward maneuvering for her gown because of the speaker and I was afraid it would not turn out on a curved surface, but it did!

looking-ghostly.jpg

Step 4: I used black paint and a thin paintbrush to paint in the line detail.

close.jpg

I also made a matching card using the Moon Mists and Organic Roots 1 Small Stencil, also by Carol Wiebe.

card-stencilgirl-lindys-hop-carol-baxter.jpg

Tips: After you spray through the stencil, flip it onto a journal page and you’ll get interesting prints and drips. Then you can use us your extra paint too!

excess-paint-spray.jpg

This was my first time using walnut-based ink sprays and I just couldn’t stop. (Sprays over over black.)

shimmery-eye.jpg

Eye-dont-know-what-to-do.jpg

Wishing you a shimmery, magical, stencil filled day,

Carol

p.s. I hope you will take the time to check out all the other amazing projects in the hop and comment to enter the contest.

Lindy's Gang Blog Hop Giveaway.jpg
GIVEAWAY

One lucky winner will receive both a $25 Gift Certificate to Lindy’s Gang
AND a $25 Gift Certificate to StencilGirl Products!

Enter to win by leaving a comment below.
Then be sure to visit the other blogs in the hop and comment to win.
The more blogs you comment on, the more chances you have to WIN!
One winner will be chosen at random from all blog comments!
(One comment per blog please.)

You have until Tuesday, April 24th at 11:59PM Central Time to leave your comments.
Winner will be announced on
StencilGirl’s Facebook page and Lindy’s Gang’s Facebook page on Wednesday, April 25.

Blog Hop Order:

April 18
Mary Beth Shaw
Gwen Lafleur
Mary C. Nasser
Debi Adams
Tina Walker
Kate Palmer
Cindy Wille
Natalie May
Pascale Bernard
Anat Weksler
Bertheas Peggy aka Nirvana
Elena Martynova

April 19
Belen Sotelo
Cindy Gilstrap
Kiala Givehand
Torrie Gass
Janet Joehlin
Valerie Ouellet
Aga Baraniak
Sivan Amedi
Aleksandra Mihelič
Joanna Marquet
Phoebe Tonosaki
Caroline Parent

April 20
Carol Baxter
Sandee Setliff
Karen Gaunt
Louise Nelson
Sherry Canino
Kerry Fellowes
Yulianna Efremova
Kasia Bogatko-Skoczypiec
Olga Bielska
Olga Ravenskaya